

Layering Paint on furniture with multiple paint colors has become the latest rage! Here are some of our favorite layering paint techniques that we've used on our furniture makeovers.

These furniture painting tutorials have become so popular that we've decided to create an additional furniture refinishing resource page dedicated to other furniture painting techniques so you can find them quickly and easily!
By the time you're finished reading this resource page you'll know how to blend and layer paint colors onto your furniture!

LAYERING PAINT ON FURNITURE
The following layered paint techniques and tutorials will help you learn how to blend and layer multiple paint colors together so you can achieve a one of a kind paint finish for your furniture!
- How To Layer Paint Colors on Furniture
- How To Build Layers With Paint
- How To Layer Paint For A Distressed Look
- How To Layer Chalk Paint With Annie Sloan Chalk Paint Colors
- How To Layer Paint and Stain
- How To Layer Paint on Glass
We'll also talk about:
- The Difference Between Blending Paint and Layering Paint
- Tips & Tricks For Getting A Natural Blended Look
- Our Favorite Chalk Paint Color Combinations
PLUS!
You'll see lots of AMAZING painted furniture ideas using various layered painting techniques!

Just think! You're one step closer to turning your boring and old furniture into a unique and expensive looking custom piece- something your friends and family will drool over! Painting furniture with multiple colors is not hard! But it can take a little bit of practice.
These advanced layered painting furniture tutorials will break things down for you step-by-step so you get the necessary detailed instructions on how to layer paint and blend paint colors so YOU look like a pro!
Creating beautiful furniture pieces is more then just about having pretty things to admire, it's about creating a space that you and your family feel comfortable and are excited to live in!
If you like the layered paint look on furniture, let us help you!
If you have any questions along the way check out our layering paint Q&A section at the bottom of this post or feel free to email us and ask!
LAYERING PAINT TECHNIQUES
1. Five Tips For Layering Paint That Will Get You Excited! - Five great tips to help you become a pro at layering paint!
2. Layering Chalk Paint on Furniture - We'll demonstrate this two tone chalk paint furniture technique on a simple headboard. This layered paint tutorial gives you step by step instructions on how to apply multiple layers of chalk paint colors.
3. Layering Paint: How To Create A Restoration Hardware Faux Finish - Easiest dry brush layering technique to get a Resotration Hardware faux finish!
4. Layering Paint: Dry Brush Painting Technique That Makes Your Furniture Look Like Art! - A fun painting technique that turns your furniture into art! This easy furniture paint layer trick can create modern looking furniture in a jiffy!

Disclaimer: This resource page may contain affiliate links for your shopping convenience. This means that I receive a small commission for purchases that are made through these links. The products that I recommend are ones that I love and use everyday. You may read our full disclosure for more info.
RECOMMENDED RESOURCES FOR LAYERING CHALK PAINT
There are ALOT of different kinds of furniture paint on the market.
If you're looking for some suggestions, click here to see some of our favorite furniture paint!
You can layer paint using chalk paint®, milk paint, mineral paint or other chalk style paints.
In my 5 Tips For Layering Paint tutorial, I talk about the importance of having both white furniture paint and black furniture paint on hand when you're layering and blending different paint colors onto your furniture.
If you haven't read it yet- be sure to check it out so you understand this furniture paint money saving trick!

FURNITURE PAINT SUPPLIES FOR LAYERING PAINT
These are the basic furniture paint layering supplies that I use to create a beautiful layered finish:
Small Artist Brushes -for getting into the details of a furniture piece and for highlighting detailed areas. These are really high quality brushes at a great price!
Black & White Paint- Learn how to stretch your money further when you're mixing and blending paint colors!
Paint Brushes- I prefer a little stiffer brush when I'm dry brushing because it helps me have a little more control over my brush strokes.
These paint brushes are both economical and fantastic to work with! I love them because they have a shorter handle so they're great for painting tight spaces- like the inside of a china cabinet.
These are FANTASTIC chalk paint brushes and wax brushes that are BOTH budget friendly AND get great reviews on Amazon!

Layering Milk Paint Colors by Salvaged Inspirations
How To Update Your Furniture With A Color Wash by Thirty Eighth Street
Paint Layering And Distressing Technique by Petticoat Junktion
Layering Paint For An Antiqued Effect by I Should Be Mopping The Floor
How To Stencil Like A Pro By Layering Paint Colors by Petticoat Junktion
Layering Paint With General Finishes Milk Paint by The Painted Drawer
Layering Milk Paint by Remodelaholic
Layering Chalk Paint & Waxes: A Secretary Desk Makeover by Artsy Chicks Rule
How To Create A Blended Paint Furniture Finish by That Sweet Tea Life
Below you'll find a few common paint layering questions we've received from our readers!
Do you have a question that's not featured here? Contact us and we'll try to answer yours!

Answer: A layered effect in painting means you're gradually building up light and/or dark hues. You build up these light or dark colors by layering one paint color on top of another.
Each paint color or medium you apply is considered a "layer".

Answer: When you're layering paint on furniture the first paint color will cover the largest area. This is called your base paint color.
Each subsequent paint color is then painted on top of the next. Normally, when you're layering paint you let the last coat of paint dry completely before you apply your next layer of paint.
You can repeat this process with as many layers of paint that you'd like.
Selecting paint colors from the same color family will produce a more subtle layered look. Pairing paint colors together from a complementary color scheme will produce a bolder looking painted furniture piece.
If you need help with pairing paint colors, this paint color wheel is an excellent tool!
Answer: Great question! Here's the difference.
Layering Paint: When you're layering paint you are applying a coat of paint on top of a dried layer of paint.
When you blend paint colors together you're working with wet paint or you are misting chalk paint that has already dried with water to make it pliable again so that you can blend with another paint color.
MORE LAYERING FURNITURE PAINT IDEAS!
Layering Milk Paint Colors by Salvaged Inspirations
How To Update Your Furniture With A Color Wash by Thirty Eighth Street
Paint Layering And Distressing Technique by Petticoat Junktion
Layering Paint For An Antiqued Effect by I Should Be Mopping The Floor
How To Stencil Like A Pro By Layering Paint Colors by Petticoat Junktion
Layering Paint With General Finishes Milk Paint by The Painted Drawer
Layering Milk Paint by Remodelaholic
Layering Chalk Paint & Waxes: A Secretary Desk Makeover by Artsy Chicks Rule
How To Create A Blended Paint Furniture Finish by That Sweet Tea Life
LAYERING PAINT Q&A
Below you'll find a few common paint layering questions we've received from our readers!
Do you have a question that's not featured here? Contact us and we'll try to answer yours!
WHAT IS A LAYERED EFFECT IN PAINTING?
Answer: A layered effect in painting means you're gradually building up light and/or dark hues. You build up these light or dark colors by layering one paint color on top of another.
Each paint color or medium you apply is considered a "layer".
HOW DO I BUILD LAYERS WITH PAINT?
Answer: When you're layering paint on furniture the first paint color will cover the largest area. This is called your base paint color.
Each subsequent paint color is then painted on top of the next. Normally, when you're layering paint you let the last coat of paint dry completely before you apply your next layer of paint.
You can repeat this process with as many layers of paint that you'd like.
Selecting paint colors from the same color family will produce a more subtle layered look. Pairing paint colors together from a complementary color scheme will produce a bolder looking painted furniture piece.
If you need help with pairing paint colors, this paint color wheel is an excellent tool!
WHAT'S THE DIFFERENCE BETWEEN LAYERING PAINT AND BLENDING PAINT COLORS?
Answer: Great question! Here's the difference.
Layering Paint: When you're layering paint you are applying a coat of paint on top of a dried layer of paint.
When you blend paint colors together you're working with wet paint or you are misting chalk paint that has already dried with water to make it pliable again so that you can blend with another paint color.
Either way the paint needs to be wet in order to manipulate and blend the two paint colors together.
If we used a sandwich as an example, the turkey, cheese, lettuce and tomato would each be a layer in the sandwich.
If we mixed the mayo and the mustard together that would be considered blending colors.
And if we slathered some of the blended mayo and mustard combo together on the sandwich that would become it's own layer- even though it is two different mediums (mayo & mustard) mixed together. ;)
Can you use more then two paint colors when you're blending?
Absolutely!
Blending colors is something that gets easier with practice so have fun with it and my best advice when you're new to blending paint colors is to practice on a piece of wood or a smaller piece of furniture that you don't care about first.
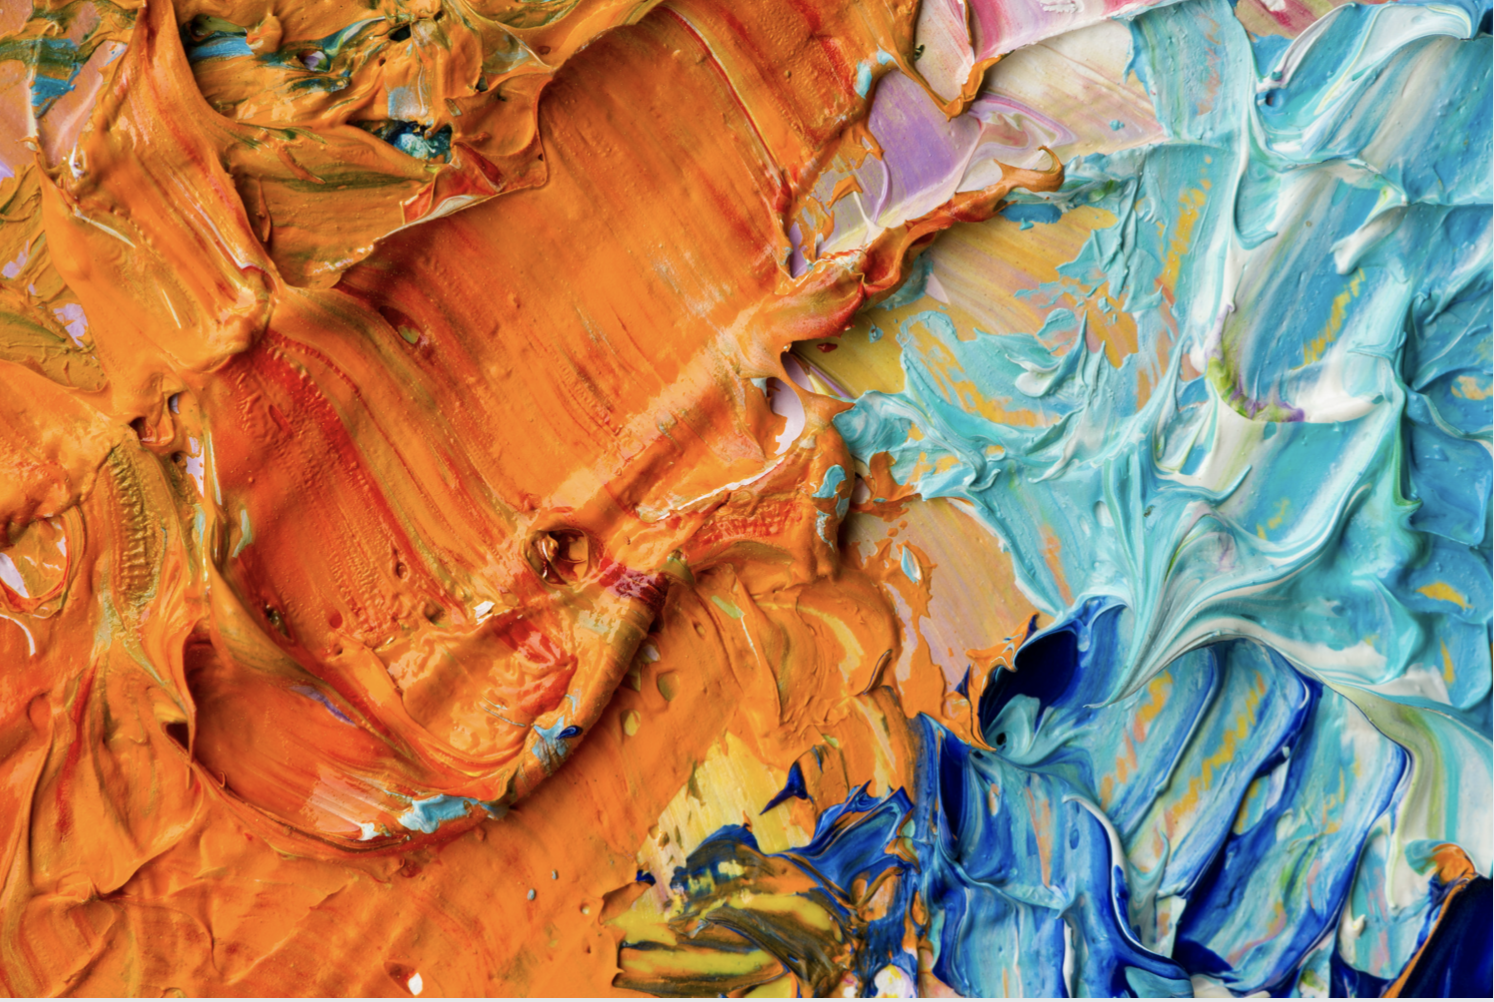
Answer: Paint pouring or paint pour is a FUN painting technique that can add unique paint layers and blended colors to your furniture or canvas.
Pour painting gives your surface a gorgeous marble effect that looks like custom art!
Pour Painting gets its name because well you guessed it, you are literally pouring out the paint!
This painting technique can get a little messy so make sure you put some tarps down and wear clothes that you don't mind getting paint on.
Keep reading to get our step-by-step instructions on how to paint pour.
Here are the steps I take to paint pour my furniture...
#1. Select a few chalk paint, chalk mineral paint or milk paint paint colors to work with.
Pour each color into it's own plastic cup or container. OR you can use these awesome reusable squeeze paint bottles for an easier application!
#2. Add some Pouring Medium to each of your paint colors. The pouring medium will help the paint flow more freely.
It also helps keep the paint colors stay separated longer for a pretty paint pour finish. Floetrol or Liquitex are also popular pouring mediums.
If you're using a thinner paint you can forgo the pouring medium and just use a spray bottle with water to help move the paint along.
How much pouring medium should you add to your paint? It depends on the product you are using.
Each medium may require different amounts. In general, I use 1 part paint to 2 parts pouring medium.
#3. Use a craft stick, straw or plastic spoon to mix the pouring medium with your paint.
#4. Pour each of your colors one at a time randomly around your surface or drawer.
#5. Begin tilting your piece of furniture in all different directions. As you rotate and tilt your furniture from side to side and hold it in position as desired. The paint will begin to slide and you'll start to see beautiful blended paint colors and patterns form.
#6. Have a spray bottle with water handy. If your paint is lacking movement, you can spritz your surface with water to help the paint move along.
Here's a fantastic video demonstration on How To Paint Pour On Furniture by Jami Ray Vintage!
Answer: Yes! You can create beautiful glass art from thrift store glass vases and they look incredible!
It's the same kind of concept as the pouring paint technique..
I've seen people pour paint into the inside of the vase then add drops of colored nail polish, slightly swirl with a skewer and then move the vase on its side and allow the paint mixture to move and slide until the entire inside of the vase is covered.
Then, let dry! Repeat with a different paint color if desired.
Lantern Lane Designs created a tutorial on How To Make Your Own Marbled Vases using this layering paint technique.
Answer: Absolutely! I like to layer with a dark stain when the wood tone color of my furniture is too light to begin with.
You can also layer using a stain to help give your furniture an old worn look.
I created two pieces of furniture from a china hutch.
After I added some furniture legs but before I painted it, I lightly stained and sanded the wood so it would give me some worn wood color tones and texture peeking through my paint color.
Layering stain starting with this Kona stain, lightly sanding it and then applying Weathered Gray stain and wiping it off gives your furniture a really nice antique finish.
You could also create a white wash effect by mixing 1-2 part(s) white paint with 1 part water and apply that over the stain once its dried.
Would you like to receive a FREE 9- page Furniture Painting Guide? Enter your email and we'll send it to you right away!
You'll also receive additional VIP furniture painting tutorials and get a sneak peek at our latest furniture before and after makeovers!
If you've finished reading through this awesome resource page, be sure to pin it so you can come back to it and have it as a resource!
We will be building this page over time with additional layered paint furniture projects.

Haven't quite got your furniture fix yet!? See even MORE painted furniture ideas right here!
Have you tried to layer paint on your furniture yet? Which furniture painting technique is your favorite?
Pin this Layering Paint resource page for later, then follow our Painted Furniture board on Pinterest!
Happy Painting!
Carrie || Thirty Eighth Street

If we used a sandwich as an example, the turkey, cheese, lettuce and tomato would each be a layer in the sandwich.
If we mixed the mayo and the mustard together that would be considered blending colors.
And if we slathered some of the blended mayo and mustard combo together on the sandwich that would become it's own layer- even though it is two different mediums (mayo & mustard) mixed together. ;)
Can you use more then two paint colors when you're blending?
Absolutely!
Blending colors is something that gets easier with practice so have fun with it and my best advice when you're new to blending paint colors is to practice on a piece of wood or a smaller piece of furniture that you don't care about first.
HOW DO I PAINT POUR MY FURNITURE?
Answer: Paint pouring or paint pour is a FUN painting technique that can add unique paint layers and blended colors to your furniture or canvas.
Pour painting gives your surface a gorgeous marble effect that looks like custom art!
Pour Painting gets its name because well you guessed it, you are literally pouring out the paint!
This painting technique can get a little messy so make sure you put some tarps down and wear clothes that you don't mind getting paint on.
Keep reading to get our step-by-step instructions on how to paint pour.
Here are the steps I take to paint pour my furniture...
#1. Select a few chalk paint, chalk mineral paint or milk paint paint colors to work with.
Pour each color into it's own plastic cup or container. OR you can use these awesome reusable squeeze paint bottles for an easier application!
#2. Add some Pouring Medium to each of your paint colors. The pouring medium will help the paint flow more freely.
It also helps keep the paint colors stay separated longer for a pretty paint pour finish. Floetrol or Liquitex are also popular pouring mediums.
If you're using a thinner paint you can forgo the pouring medium and just use a spray bottle with water to help move the paint along.
How much pouring medium should you add to your paint? It depends on the product you are using.
Each medium may require different amounts. In general, I use 1 part paint to 2 parts pouring medium.
#3. Use a craft stick, straw or plastic spoon to mix the pouring medium with your paint.
#4. Pour each of your colors one at a time randomly around your surface or drawer.
#5. Begin tilting your piece of furniture in all different directions. As you rotate and tilt your furniture from side to side and hold it in position as desired. The paint will begin to slide and you'll start to see beautiful blended paint colors and patterns form.
#6. Have a spray bottle with water handy. If your paint is lacking movement, you can spritz your surface with water to help the paint move along.
Here's a fantastic video demonstration on How To Paint Pour On Furniture by Jami Ray Vintage!
CAN I LAYER PAINT ON GLASS?
Answer: Yes! You can create beautiful glass art from thrift store glass vases and they look incredible!
It's the same kind of concept as the pouring paint technique..
I've seen people pour paint into the inside of the vase then add drops of colored nail polish, slightly swirl with a skewer and then move the vase on its side and allow the paint mixture to move and slide until the entire inside of the vase is covered.
Then, let dry! Repeat with a different paint color if desired.
Lantern Lane Designs created a tutorial on How To Make Your Own Marbled Vases using this layering paint technique.
CAN I LAYER PAINT AND STAIN?
Answer: Absolutely! I like to layer with a dark stain when the wood tone color of my furniture is too light to begin with.
You can also layer using a stain to help give your furniture an old worn look.
I created two pieces of furniture from a china hutch.
After I added some furniture legs but before I painted it, I lightly stained and sanded the wood so it would give me some worn wood color tones and texture peeking through my paint color.
Layering stain starting with this Kona stain, lightly sanding it and then applying Weathered Gray stain and wiping it off gives your furniture a really nice antique finish.
You could also create a white wash effect by mixing 1-2 part(s) white paint with 1 part water and apply that over the stain once its dried.
ADDITIONAL FURNITURE PAINTING RESOURCES
- How To Transform Second Hand Furniture Easily!
- Grab Our FREE 9-Page Furniture Painting Guidebook HERE!
- Our Most Popular Furniture Refinishing Tutorials!
- Favorite Furniture Painting Products & Tools Guide
Would you like to receive a FREE 9- page Furniture Painting Guide? Enter your email and we'll send it to you right away!
You'll also receive additional VIP furniture painting tutorials and get a sneak peek at our latest furniture before and after makeovers!

If you've finished reading through this awesome resource page, be sure to pin it so you can come back to it and have it as a resource!
We will be building this page over time with additional layered paint furniture projects.
WANT MORE PAINTED FURNITURE IDEAS?
Haven't quite got your furniture fix yet!? See even MORE painted furniture ideas right here!
Have you tried to layer paint on your furniture yet? Which furniture painting technique is your favorite?
Pin this Layering Paint resource page for later, then follow our Painted Furniture board on Pinterest!

Happy Painting!
Carrie || Thirty Eighth Street


No comments