Home Decor

Home Decor
Home Decor Ideas

Best Furniture Paint

Best Furniture Paint
Favorite Furniture Paint

BEST Furniture Makeovers

BEST Furniture Makeovers
Best Furniture Makeovers

7 Unique Unicorn SPiT Furniture Makeovers


Learn how to use Unicorn SPiT PLUS see 7+ Unique Unicorn SPiT Furniture Makeovers!


Let's take a break from talking about paint for a minute. Let's talk spit. 

It has four letters. 


Cowboys & ranchers do it. Athletes & coaches do it. 

Bikers do it. 

Personally, I think its kind of gross. 

But, if you add the word Unicorn in front of it... it becomes a real game changer.


Disclaimer: Unicorn SPiT™ provided me with Unicorn SPiT's Gel Stain and Glaze in One™ to try. However, all of my opinions are honest and 100% my own. This post contains a few affiliate links to help you find the products I like. You are NOT charged extra to use any of the links. You can view our full disclosure here. 


unicorn spit, gel stain, colored stain, unicorn spit stain, unicorn spit gel stain


WHAT IS UNICORN SPiT?


What is Unicorn SPiT™? Artists are playing with it. DIY-ers are creating with it and furniture enthusiasts can't get enough of it!


Unicorn SPiT™ stain is a vibrantly colored wood stain that is COLORFUL non-toxic, and water based. One of the best things about it? It doesn't smell like a stain, it smells like Jasmine! 


That's right, Unicorn SPiT™ actually makes you smell good! 


HOW DO YOU USE UNICORN SPiT STAIN?


You can use Unicorn SPiT on wood, glass, metal, fabric, wicker, pottery, concrete and laminate. But today, I want to show you how you can use it to create some amazing Unicorn SpiT furniture makeovers!

You can apply Unicorn Spit with a paintbrush, syringe, a roller brush or with your very own hands! 

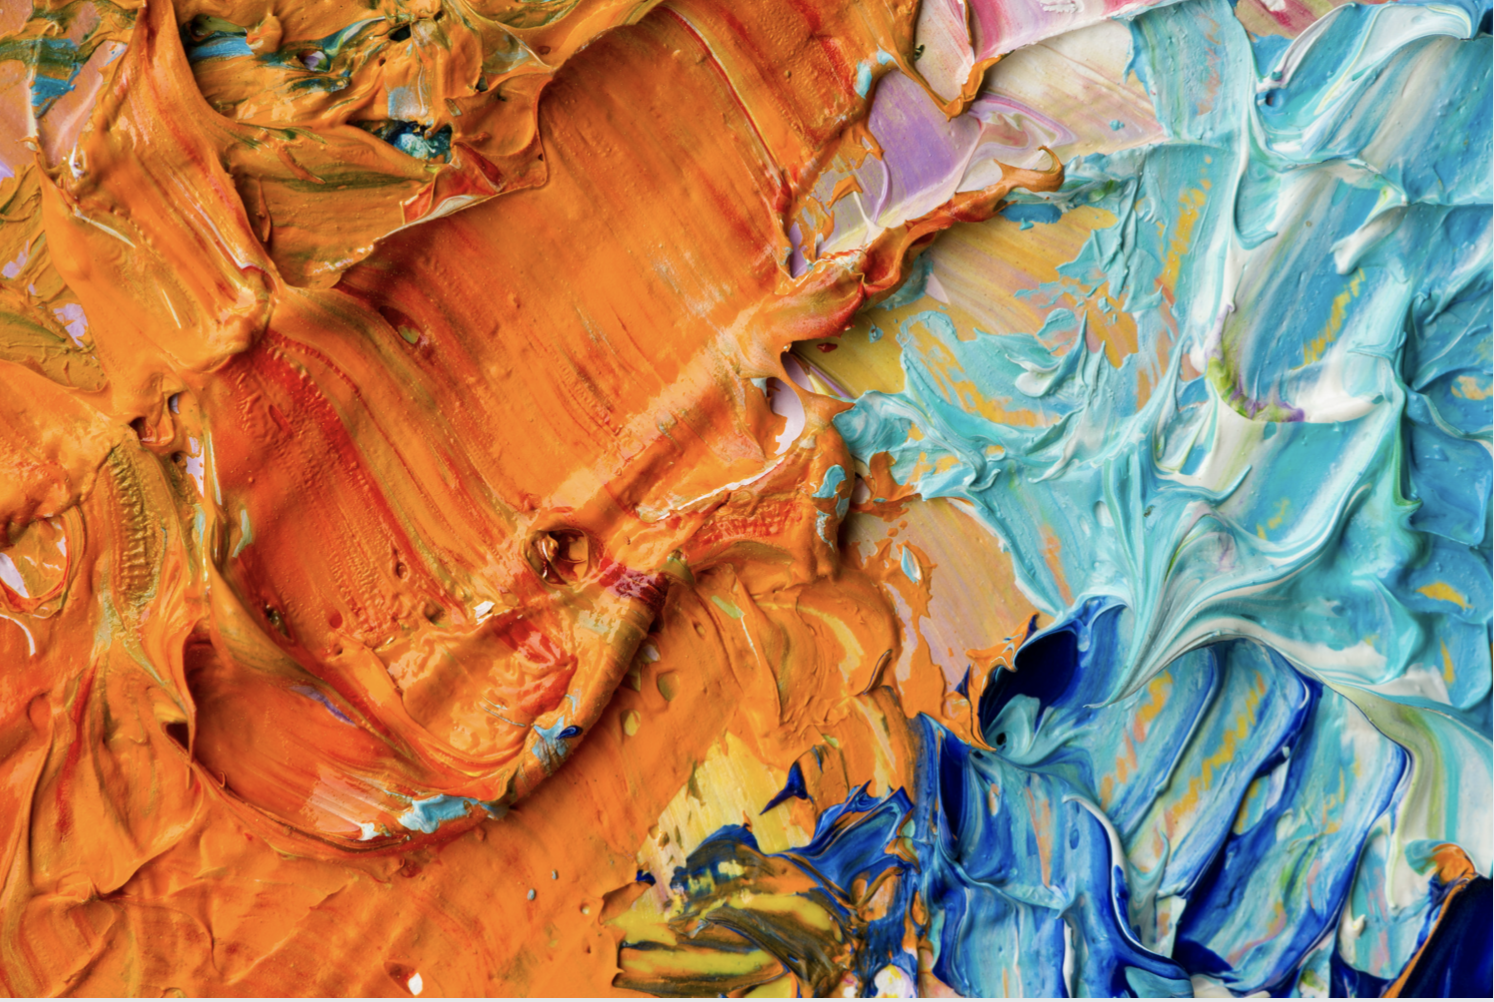
Unicorn SPiT's beautifully vibrant colors soak deep into the wood grain and when you combine multiple colors together, you can create GORGEOUS three-dimensional effects that would take hours to replicate with other products. 


It makes you look like a master artist and all you did was, well... spit!


UNICORN SPiT TECHNIQUES 


Michelle Gordon is the creator and founder of Unicorn SPiT™ and has created some amazing techniques using this vibrant color stain. 


You can use Unicorn SPiT as a stain, paint or a glaze! 


Check out this Unicorn SPiT Pull Method by Mag Designs.
 

\


Whatever method you use to add dimension, vibrant art and unique results to your furniture  makeover and DIY projects, be sure to use only oil based top coats to seal the Unicorn SPiT™ with.


UNICORN SPiT TOP COATS


These are all great top coat choices you can use to seal Unicorn SPiT™ with. 


WHERE CAN I BUY UNICORN SPiT?™


You can purchase Unicorn SPiT at retailers or here on Amazon! 

You can buy colors individually or you can purchase Unicorn SPiT colors in sets. 


This set RIGHT HERE is highly rated because it gives you 10 different 8 oz. vibrant colors!


I personally love the colors Phoenix Fire, Pixie Punk Pink, Zia Teal and Blue Thunder because when you mix them together, they make for a really pretty sunset.


UNICORN SPiT FURNITURE


Below you'll find 7 Unique Unicorn SPiT Furniture Makeovers to help inspire your creativity! 

Which one is your favorite?


unicorn spit, unicorn spit furniture, painted furniture, furniture makeovers


Nesting Tables With Unicorn SPiT BY Uniquely Grace 


Unicorn SPiT Stained Table by Cozy Traditional Home


Table Makeover Using Unicorn SPiT By From Evija With Love


Aura Blast Design With Unicorn SPiT by All Things New Again

Thrift Store Cabinet Painted With Unicorn SPiT by Katie Slentz


Unicorn SPiT Gel Stain Freehand Flower Table by Holly's Hobbies

Dresser Makeover With Unicorn SPiT by Amini Design Ashburn


Unicorn SPiT Side Table Makeover by The Navage Patch


Vintage Desk Makeover with Unicorn SPiT by Designed Decor


Think of all the cool DIY art and furniture projects you could create with Unicorn SPiT!

Happy Spitting!... Carrie

0

Country Chic Guest Post: The Thompson Dresser

*Country Chic Paint provided me the paint supplies to create and design this furniture makeover and DIY project. All of the opinions and thoughts contained in this post are honest and 100% my own. 

I am excited to be able to share another Guest Post at Country Chic Paint today! I decided to go big & bold or go home with this next transformation! I found this Old World dresser at my local thrift store. It possessed nine clean drawers and amazing hardware and it had me at swirl.

dresser makeover, before, country chic paint, old world dresser, painted dresser

What it lacked in height, I could give her and what it lacked in color... well my heavens, I could fix that too!

If you haven't yet tried Country Chic Paint before, you're really missing out! Country Chic Paint is a chalk and mineral based paint that goes on so smooth, dries quickly and produces such a beautiful finish. It's really one of my top three favorite paints to work with! 

mustard yellow paint, mustard yellow dresser, diy, dresser makeover

I decided to put Country Chic Paint to the test. Could I really push the limits and complete a dresser transformation with just one pint of paint? I was a little nervous. Then, I reminded myself that the theme for this project was "Go Big and Bold or Go Home", so I went for it!

Not only did I have enough for this long dresser but I still had a little bit left over for some DIY Art Work. I think that says a lot about the quality of their paint. If you missed it, hop on over and check out this DIY Hand Painted Sign shown below photos that I made with my left overs. ;) 

Before I opened up my can of Fresh Mustard paint, I added bun feet to the bottom of our dresser. If you're interested in learning more about how to add legs to furniture, you can check out our full tutorial here. To keep with the Old World look, I opted to give it a heavily distressed finish. But, I didn't use sand paper and I didn't use a wet rag to accomplish this. Instead, I used a Reverse Distressing technique explained here in our Guest Post

From drab to fab, The Thompson Dresser is brighter, bolder and a little bit taller. 

dresser makeover, furniture makeover, painted dresser, adding feet to a dresser, diy

reverse distressing, old world dresser, mustard yellow, fresh mustard, country chic paint, diy, painted dresser, refinished dresser

mustard yellow, how to add legs to a dresser, painted dresser, dresser makeover, refinished dresser, diy,


yellow dresser, how to paint a dresser, refinishing furniture, painting furniture, diy


painted dresser, painted furniture, refinished dresser, refinished furniture, furniture makeover, dresser makeover, diy, mustard yellow, yellow, reverse distressing, how to add legs to furniture, how to add feet to furniture

Encouraging you to do something Big and Bold this week! If you do, please leave me a link in the comments, I'd love to see what you come up with!

Take Care!
Carrie || Thirty Eighth Street
4

DIY Hand Painted Sign Ideas


If you are my twin, then you missed the "Naturally Gifted Handwriting" line in Heaven. I'm in awe at some of the extraordinarily talented individuals that can hand letter like nobodies business. I'm inspired by their talents and it gives me the drive to keep on practicing.  ;)

DIY signs have been around for a long time and there are so many different ways to create them. You can use stencils, vinyl lettering, wood appliqués, etc. But, you can also make them without any of things or any expensive programs. For this tutorial, all you need is your computer/ printer, tape, a pencil, paint/brushes, carbon paper and some wood!


diy, lettering, wood sign, how to make a diy sign without stenciling, painted sign, vintage

1. Gather Your Wood. 
Select your wood and determine the size of your sign. 

We chose a sheet of Lauan Plywood from Home Depot because it's inexpensive and light. You can cut it yourself or if you happen to purchase yours from Home Depot, they'll cut it for you! We asked them to cut ours to 48" wide by 36" tall. When we arrived home all it needed was a light sand along the edges. Time saver! For the trim, we used the cheapest 1 1/2 boards we could find. The more knots and imperfections the better. We wanted it rustic.


2. Create Your Design.
Collect your inspiration and choose your color palette. 

 For our sign, we selected three hues from Country Chic Paint. The background was painted in Vanilla Frosting then dry brushed with Dark Roast. We also used Dark Roast and added Mustard for the lettering.

Start by painting the backdrop. While you're background layer dries open up a new Word Document and create your saying. All of my block words were printed from Word. If you want really LARGE letters (like the word "happy" below), you can create your text in just about any FREE Photo Editing online site (Pixlr, Fotor, are just a few examples) using a plain white digital paper. (I've included an example directly below. Hover your mouse over the below space, (I promise it's there!) Feel free to save it for your own personal use.) 
digital paper, free digital paper, white paper

Once you have the white digital paper saved, upload it to your favorite photo editing site and use the add text function to create your word(s). I like to use Fotor.com because that's one site where you can access your own fonts. Once you have it the way you like it, save it as a jpg. (The size of your word/phrase doesn't matter at this point). We're going to blow it up in just a minute using another FREE program.

Next, take your edited .jpg you just created and upload it to Block Posters. A fabulous free program that allows you to enlarge any .jpg image. You tell it how many paper sizes wide and tall it should be and it will create an enlarged version. Once printed you do a quick re-assembly with some tape and put it back together. (Visit here to see another example of how this is done.) Here's my "happy" all in one piece.


how to make a painted sign without stenciling, hand lettering, diy, painted signs, wood sign


3. Easy Trace Method
Grab a pencil and your Carbon Paper

Carbon paper can be found at just about any Office Supply store. You will get more sheets then you need for around $5. I used just one sheet for this project and can still re-use it again and again for another project. Once your background is dry, position your words on your Lauan and give them a quick two piece scotch tape just temporarily hold them in place. Starting at the top (because you don't want crawl over a word that's already been carboned on, place a sheet of carbon under a word and LIGHTLY trace around your letters. I traced my words too hard and had to do an extra coat of paint to cover them up. Trust me lightly tracing will get the job done. ;)


how to make a wood sign with carbon paper, diy painted sign, hand painted lettering


This is what it will look like when you take the carbon paper away. Don't worry too much if your tracing isn't perfect (see mine!), paint can fix that later.

using carbon paper to trace letters, how to trace letters for a sign, diy, painted sign


And when you're finished it should look something like this..

tracing letters with carbon paper, diy, how to create a hand painted without stencils, painted signs


4. Time to paint.

Small stiff brushes will become your new best friend for this project. This part takes a little bit of time so turn on a good movie and have at it!


painting signs, diy, make your own art, diy art, make your own sign, hand lettering


You can either paint and take a sander to it afterwards to give it more of a vintage feel or you can go light on the paint in areas and give the same effect (like I did on "Skies Are Gray").

diy art, how to make signs, painted signs


When you're finished, measure the width and length of your board and make your trim cuts accordingly. Depending on the look you're going for, you can choose to stain, paint them or leave them as is. We stapled our Lauan board to our frame but you could also use short screws as well. If you have one you'd like to show case place your link in the comments, I'd love to see it!


Have a great week!
Carrie || Thirty Eighth Street


2

OFMP: The Marissa Dresser

**This project was sponsored by The Old Fashioned Milk Paint Co. However, the opinions and thoughts expressed within this post are 100% my own. 

It's a brand new month. Do you know what that means? We are rocking and rolling our way into another Fab Furniture Flippin' Contest. Are you ready to see which contestants will have their game face on? Curious to learn more about our WONDERFUL sponsor for June? Interested in finding out the details of this months GRAND PRIZE? Dear Fabulously Talented Winner whom I have yet to meet... you are in for a treat! 

The amazingly talented Charlotte from Ciburbanity and I are excited to co-host this month's competition which begins TODAY! Here are some of the exciting details for this month's contest...

June 2015 Theme: "Shabby Chic Storage"
Submission Deadline: Friday, June 19th @ 11:59 PM EST
PRIZE PACKAGE: 
-Six (quarts) of OFMP (your choice of colors)
-One (quart) of Extra-Bond
-One (pint) of Antique Crackle
-One (5 oz.) Tin of Daddy Van's Clear Wax
-One (2 oz.) Tin of Daddy Van's Antique Brown Wax
-One (2 oz.) Tin of Daddy Van's Shadow Black Wax

If you were the winner, what in the world would YOU create with all of these FABULOUS OFMP products? Which Milk Paint colors would you select? Can I help you visualize what a refinished piece would look like in Pitch Black? In the spirit of our June Theme, "Shabby Chic Storage" I hand selected this particular old and worn dresser because she possessed four deep drawers, had beautiful details and exquisite knobby legs. Here she is getting a quick and light sanding in the garage. All those in favor of a new paint color, say "I"?

before and after, milk paint, diy, painting a dresser, ofmp, old fashioned milk paint, painted dresser, pitch black, shabby chic, fffc, furniture flip

This was my first experience using Old Fashioned Milk Paint and I'm not going to lie, I was a little nervous to try it. But, do you know what I would tell my older self after knowing what I know now? Don't you dare spend another minute fretting. It's a cinch to mix and it's even easier to apply... You can do this! You've got this! And, it's going to turn out great!

ofmp colors, pitch black, diy, painting furniture, fab furniture flippin contest

After I sanded the dresser, I moved it inside to paint. For this project, I mixed together 1 cup of Old Fashioned Milk Paint in Pitch Black with 1 cup of warm water. After it was mixed well, I added 1 cup of Extra Bond to the paint to encourage adhesion. Using Extra Bond gives YOU the chance to control how chippy you want a piece to be. I absolutely LOVE that OFMP is non-toxic and completely environmentally safe. There were no odors while I mixed and applied the paint indoors and it gave me the loveliest coverage on the FIRST coat! (I still had more then 1/4 of my mixed paint left when my project was finished. A little bit goes a long way!) I'm so impressed with the safe flexibility that OFMP provides... You can paint walls, children's furniture and toys and it's 100% naturally safe!

Would you like to see the end result? Here she is, The Marissa Dresser with all of her "Shabby Chic Storage" details...
before and after, painted dresser, how to paint a dresser using milk paint, ofmp, refinished furniture, furniture makeover

Wouldn't she make a stylish storage solution for an entry way, bathroom, extra bedroom or office?

shabby chic, distressing, pitch black milk paint, painted dresser in pitch black

black and white dresser, before and after, diy, furniture makeover, refinished furniture, painted black dresser

how to paint a dresser, painted furniture, flipping furniture, milk paint, how to use milk paint, diy

how to refinish furniture, diy, ofmp, old fashioned milk paint, black and white dresser

mustard yellow, dresser, furniture, refinishing furniture, painting furniture, diy, fab furniture flipping contest

fffc, ofmp, diy, staging furniture, how to refinish furniture, painting furniture, pitch black

black dresser white knobs, diy, before and after, furniture makeover, dresser makeover, storage solutions

shabby chic storage, distressing, milk paint, ofmp, painted dresser, before and after, painted dresser

painting with milk paint, how to use milk paint, ofmp, pitch black, old fashion milk paint colors

painting a dresser, refinishing a dresser, furniture makeover, dresser makeover, ofmp, diy, milk paint

fab furniture flippin contest, diy, before and after, furniture makeover, painted dresser, painting furniture
milk paint, flipping furniture, how to paint a dresser, how to use milk paint, diy, fffc, furniture contest

What else you can do with OFMP? Hop on over to see what my co-host, Charlotte from Ciburbanity as well as the rest of our talented hosts have cooked up and prepare to have your socks knocked off!

Evey [Evey's Creations] (Co-Creator) Stacy [Anastasia Vintage] (Co-Creator)
Charlotte [Ciburbanity] Lynn [Fern Avenue]  Michelle [Dandelion Patina]

furniture flipping, furniture contests, refinishing furniture, painting furniture, fffc, diy, before and after


This contest is officially open! Those bloggers that belong to the group and have signed up for June, feel free to link up on any of the hosts' blogs!... I cannot wait to see what YOU create!

Carrie || Thirty Eighth Street


36